

Install EdgeComet on Cloudflare automatically
EdgeComet installs itself on your Cloudflare zone after you connect your Cloudflare account. It adds a Worker that sends search engine and AI bot requests to EdgeComet, plus a firewall rule that lets EdgeComet's own requests through, and then tests both. The install takes about a minute.
Human visitors keep loading your site from your origin as before. This is the setup people search for as a prerender or dynamic rendering Worker on Cloudflare.
If a Worker already runs on your site, add EdgeComet to it instead. See Add EdgeComet to an existing Cloudflare Worker.
What the install does
The install connects to Cloudflare's API with the access you grant and makes four changes to your zone:
- It uploads a Worker that sends
GETandHEADpage requests from crawlers to EdgeComet and passes everything else to your origin. - It adds a Worker route for each proxied hostname, such as
example.com/*andwww.example.com/*. - It adds routes that keep your static asset folders off the Worker, picked from a scan of your homepage.
- It adds a firewall custom rule that lets requests carrying your site's render key skip your security rules.
The Worker follows the routing rules in How EdgeComet routes bot traffic. Each change is listed in What EdgeComet adds to your zone.
Before you start
- A website in EdgeComet. See Add your first website.
- Your site's zone is active on Cloudflare, and its apex and
wwwDNS records are proxied (orange cloud). - No other Worker has a route on your site's hostname, on any path. If one does, see When to merge.
- Access to the Cloudflare account that holds the zone. If someone else manages it, invite them to the website as an Admin to run the install. See Share one website.
Open Configuration > Connections > CDN integration and choose Cloudflare, or click Start setup on the website's Getting started page. Sites detected on Cloudflare also get the install as the last step of Add your first website.
Install with your Cloudflare account
- Click Connect Cloudflare account, then approve EdgeComet on Cloudflare's consent screen. One authorization covers every website on that Cloudflare account. You can review it under Cloudflare app.
- EdgeComet runs its preflight checks. Nothing on your site changes during the checks.
- EdgeComet scans your homepage for static asset folders and proposes them for exclusion.
- Review the summary under Ready to install, then click Install and confirm Deploy the worker?.
- The progress view shows Installing EdgeComet. It usually takes under a minute, and it keeps running if you close the tab.
- The checklist ends with Test request as Googlebot. When it passes, the card reads Installed on Cloudflare.
For the permissions the authorization grants and what each one is used for, see Cloudflare permissions.
Install with an API token
Use an API token when you cannot approve a third-party app on your Cloudflare account.
- Open Use an API token instead and click Create a token on Cloudflare. Cloudflare opens a token form prefilled with the permissions EdgeComet needs.
- Narrow the token to your zone on Cloudflare's form if you want, then create it.
- Paste the token and click Connect & check. EdgeComet stores it encrypted and uses it only for this site.
- Continue from step 2 of Install with your Cloudflare account.
The token needs Zone WAF: Edit for the firewall rule. Without it, preflight warns that the rule cannot be added, and the Worker installs without it.
Preflight checks
Preflight confirms that the install can work and cannot break your site:
- Site found on Cloudflare: a zone covers your domain and is active.
- Traffic runs through Cloudflare: every apex and
wwwDNS record is proxied. EdgeComet never switches proxying on for you. - Nothing else installed in the same place: no other Worker route covers the same paths. EdgeComet does not install over an existing Worker.
- Allowed to add the firewall exception: the authorization or token can write firewall rules.
- Room for one firewall exception: your Cloudflare plan has a free custom rule slot.
- Bot Fight Mode: a warning when Bot Fight Mode is on. See Bot Fight Mode.
The first three checks stop the install before anything changes. Fix the cause in Cloudflare, then run the checks again.
The firewall checks and Bot Fight Mode only warn: the Worker still installs. See If it does not work.
Static asset folders
EdgeComet scans your homepage in a headless browser and proposes the folders that hold only static files, such as /_next/static or /wp-content/uploads. Routes for these folders skip the Worker, which saves Worker requests on your Cloudflare plan.
Under Advanced settings, uncheck a folder to keep it on the Worker, or add your own path, such as /static/files, without wildcards or spaces. The Worker sends static files to your origin in any case, by file extension. The folder routes only stop Cloudflare from running the Worker for them.
If the scan fails, the install offers to continue with standard settings. Asset requests then run through the Worker too, and you can run Re-analyze assets later.
What EdgeComet adds to your zone
| Item | What it does |
|---|---|
Worker edgecomet-router-{id} | Sends GET and HEAD page requests from crawlers to EdgeComet. Everything else goes to your origin |
| A route per proxied hostname | Runs the Worker on example.com/* and www.example.com/*, with the request-limit failure mode set to Fail open |
| Asset exclusion routes | Run no Worker on the static asset folders you kept |
| Custom rule "EdgeComet renderer allow rule - managed by EdgeComet, do not edit" | Matches (any(http.request.headers["x-render-key"][*] eq "YOUR_RENDER_KEY")) and skips the remaining custom rules, rate limiting rules, managed rules, Super Bot Fight Mode and the legacy security products |
The firewall rule matches only EdgeComet's own requests to your site, which carry your render key. It does not match bots or visitors.
When your Cloudflare plan refuses one of the legacy products, EdgeComet leaves that product out of the rule. For the same rule written by hand, see Cloudflare WAF.
What bots get when EdgeComet cannot answer
The Worker fetches the page from your origin when EdgeComet does not answer within 60 seconds, the connection fails, or the response has no EC-Source header or a 5xx status. Bots then get your regular page. A response with EC-Source, such as a redirect or a 404 from a URL rule, reaches the bot as EdgeComet sent it.
Workers on the Cloudflare Free plan have a limit of 100,000 requests a day. The install sets each main route's failure mode to Fail open, which makes Cloudflare skip the Worker after the limit and send requests to your origin until the daily reset.
If Cloudflare does not confirm the setting, the card shows Set the route's Failure mode to "Fail open". Open Workers Routes in Cloudflare and edit each EdgeComet route. Under Request limit failure mode, select Fail open (proceed), then click Re-run checks.
Bot Fight Mode
Bot Fight Mode can challenge EdgeComet's requests to your site. Cloudflare offers no exception for it, not even the EdgeComet firewall rule. Turn it off under Security > Settings > Bot traffic, or move to a Cloudflare plan with Super Bot Fight Mode, which the EdgeComet firewall rule skips.
Preflight shows Bot Fight Mode is on when it detects it. For other security products, see Let EdgeComet through your firewall.
Check the integration
The install runs Test request as Googlebot as its last step. EdgeComet requests your homepage through Cloudflare as Googlebot and expects an answer from EdgeComet, then requests it as a browser and expects no EC- headers.
The step Connect your CDN platform shows Done once the test passes, or at the first visit from a verified bot. For the next checks, see Check that search and AI bots reach EdgeComet.
Manage or remove the connection
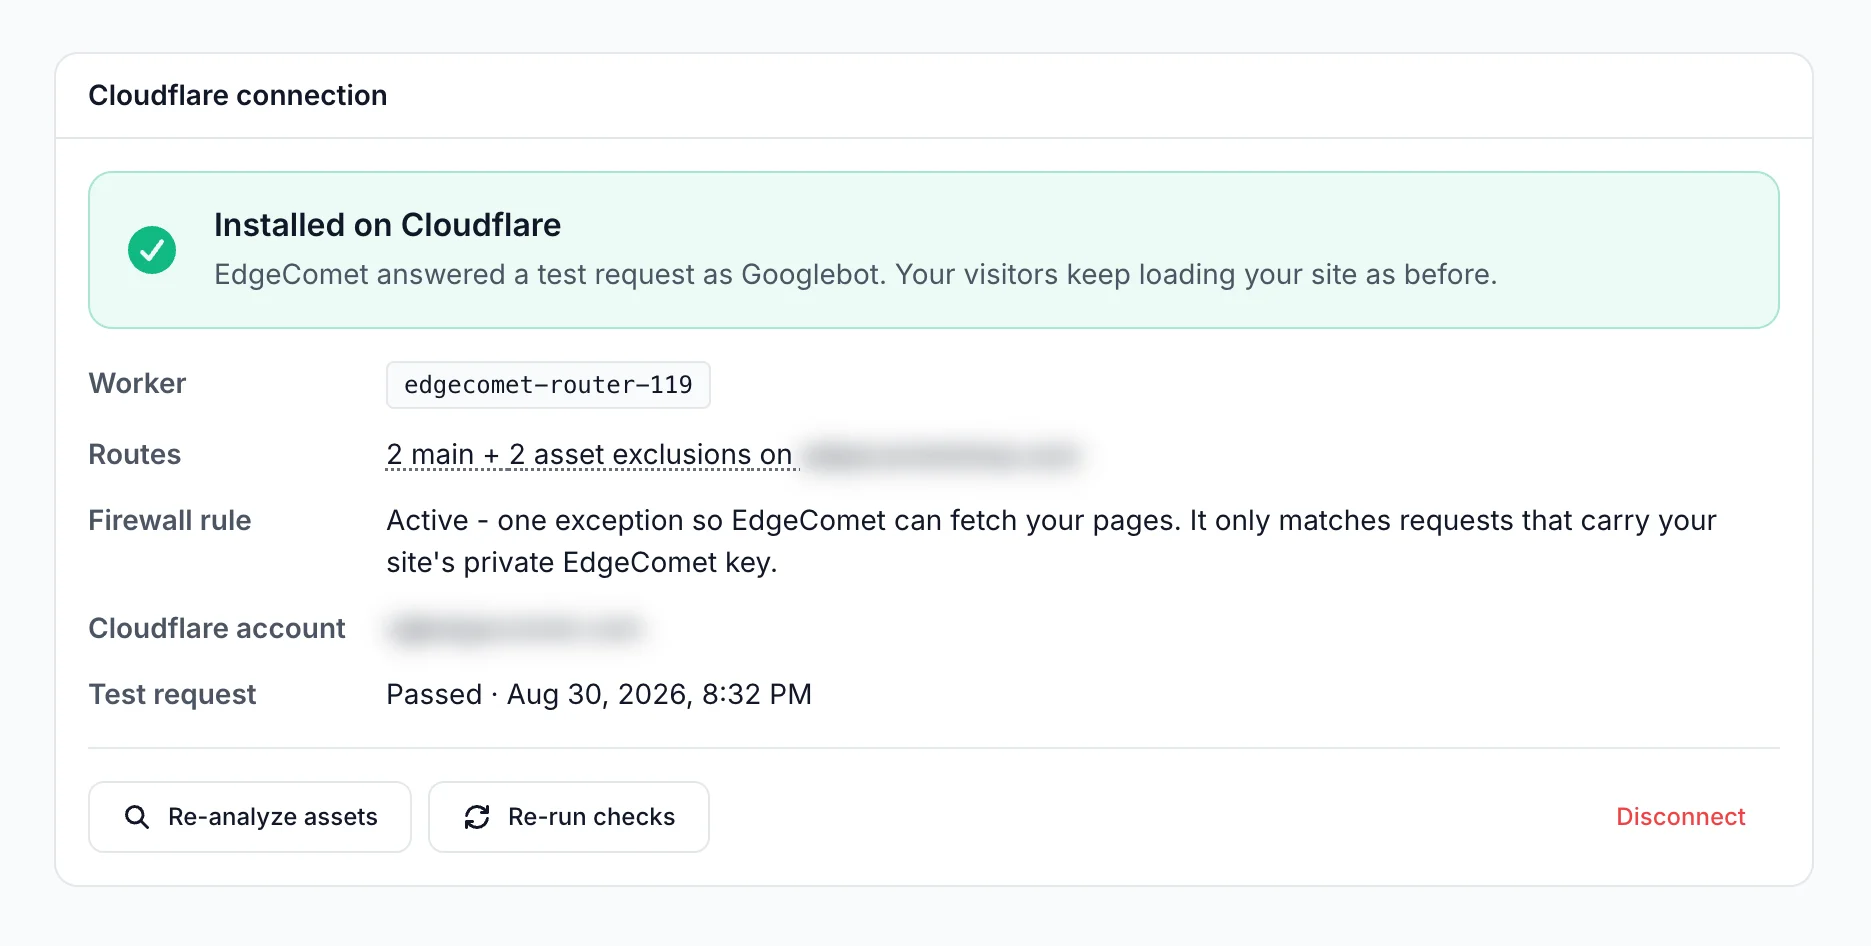
Open Configuration > Connections > CDN integration. The Cloudflare card shows the Worker, the routes, the firewall rule, the Cloudflare account and the last test request:
- Re-analyze assets: scans your homepage again and rebuilds the folder list.
- Re-run checks: runs preflight again and updates the firewall rule, for example after a render key rotation.
- Disconnect: removes the Worker, its routes and the firewall allow rule from your zone. Bots then get your regular pages from your origin.
Disconnect removes only what EdgeComet created. After a token install, revoke the token in Cloudflare under My Profile > API Tokens. After an install through your Cloudflare account, the authorization stays until you remove it.
If it does not work
"We stopped before changing anything"
Another Worker has a route on your site's hostname, and EdgeComet does not install over it. Something else is installed in the same place names the Worker and its route pattern. Remove that Worker or move it off the hostname, then click Check again.
To keep your Worker, add EdgeComet to it, or click Schedule a call with an engineer. See Add EdgeComet to an existing Cloudflare Worker.
"Cloudflare checks did not pass"
The preflight list shows which check failed. The most common cause is an apex or www DNS record that is not proxied. Switch the record to Proxied in Cloudflare DNS, then run the checks again.
"Your Cloudflare plan's custom-rule limit is full"
The firewall rule could not be added. Remove a custom rule or upgrade your Cloudflare plan, then click Retry rule.
You can also add the rule by hand from the expression on the card. See Cloudflare WAF.
"Your Cloudflare connection cannot manage firewall rules"
The authorization or token lacks Zone WAF: Edit. Reconnect your Cloudflare account, add the permission to the token under My Profile > API Tokens, or add the rule by hand.
"Firewall rule holds your previous render key"
Your render key was rotated after the install. Click Re-run checks to update the rule with the new key.
"The install did not finish"
The deploy stopped part way, or Cloudflare refused a request. Retrying is safe: it keeps what is already in place and finishes the rest. If the message names a missing permission, such as Workers Scripts: Edit, reconnect or re-create the token with it first.
Test request: "Not confirmed yet"
The Worker is installed, but the test request as Googlebot did not come back from EdgeComet. Bot Fight Mode or a firewall rule often challenges this test, because it comes from EdgeComet's servers and not from Google. See Verify install: "Could not confirm".